The Power of Visuals: Mastering the Image Block in Salesforce Marketing Cloud
- sfmcstories
- Jul 13, 2025
- 3 min read
In the world of email marketing, visuals speak louder than words. Whether you’re promoting a product, building brand recognition, or engaging your audience emotionally, images play a vital role. In Salesforce Marketing Cloud (SFMC) Email Studio, the Image Block is your go-to tool for managing and embedding visuals into your emails with ease and consistency.
This blog offers a classic deep dive into everything you need to know about the Image Block—its features, use cases, best practices, and tips to elevate your design game.

What is the Image Block?
The Image Block in SFMC Email Studio is a drag-and-drop content block that allows marketers to insert static images into emails. These images can be uploaded manually, selected from the Content Builder library, or sourced via external URLs. Each Image Block can be styled, resized, and hyperlinked to support email objectives—from product clicks to campaign conversions.
Where to Find It
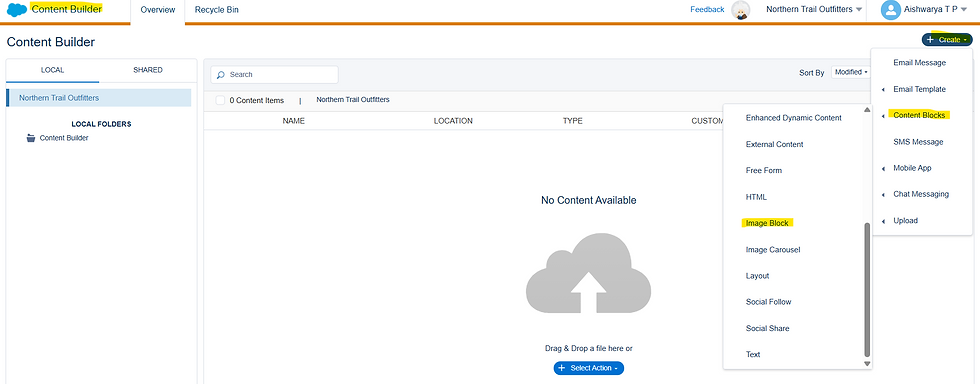
You can add an Image Block by navigating to Email Studio > Content > Create > Content Blocks > Image Block. OR Content builder > Create > Content Blocks > Image Block. Within the editor, you’ll find the Image Block in the list of available content blocks. Simply drag it into your layout where needed.

Key Features of the Image Block
Upload or Select Images: Choose from your existing Content Builder library or upload a new image (JPG, PNG, GIF, etc.).
Alt Text Support: Add alternative text for accessibility and improved deliverability.
Responsive Design: Images scale automatically for mobile and desktop formats.
Linking: Add a destination URL to the image (external site, Cloud Page, or email preference center).
Styling Options: Control alignment, padding, borders, and more.
Tagging and Naming: Organize assets with descriptive tags and folder structures.
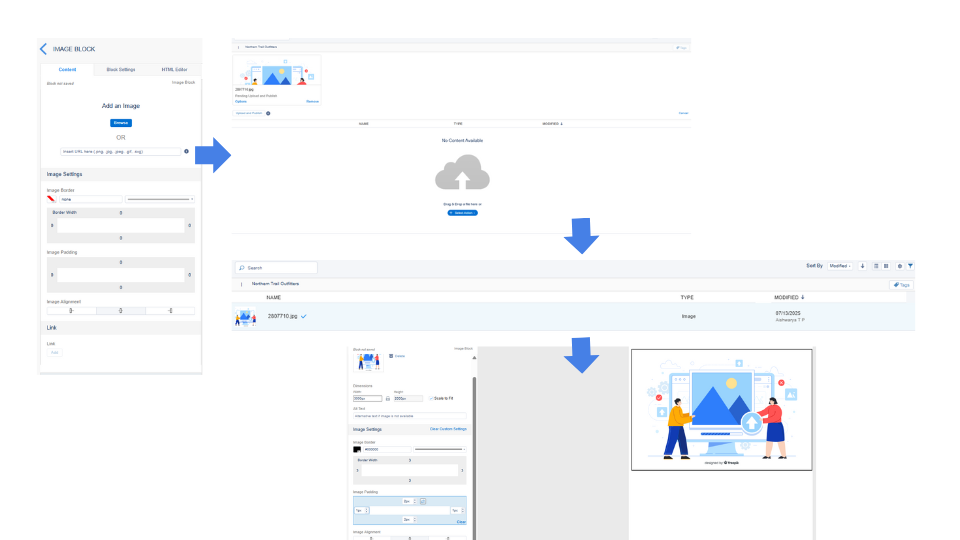
1. Browse image 2. Upload & Publish Or 3. Select uploaded image 4.Image block view 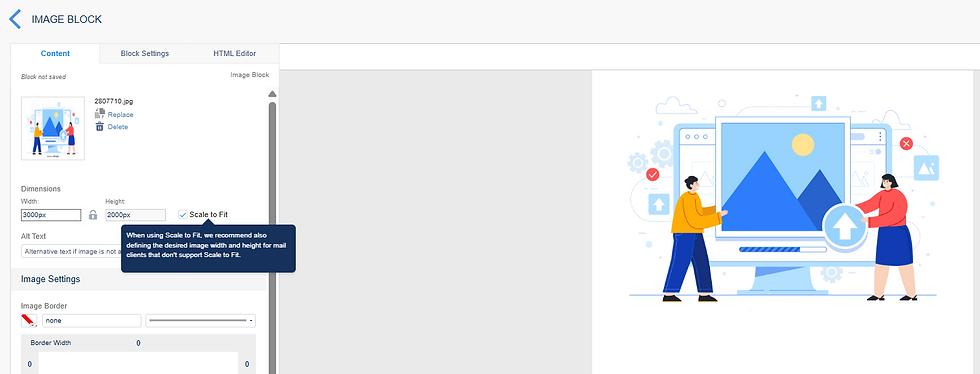
Dimensions: Upload retina images(scalable, so that it becomes easily responsive). Add alt text, readable by screen readers. Add image border and width.


Use Cases
Hero Banners: Highlight major promotions or headlines.
Product Showcases: Display items with a clickable call-to-action.
Event Invitations: Embed visually rich graphics for upcoming webinars or events.
Branding: Maintain visual consistency with logos, badges, or icons.
Best Practices
Optimize for Speed: Use compressed images to avoid slow load times.
Use Descriptive Alt Text: Help users with image-disabled email clients understand your message.
Keep Image Dimensions in Check: Stay within recommended width (600px) for responsive rendering.
Avoid Image-Only Emails: Combine images with text to ensure message clarity and improve accessibility.
Host Images in SFMC: For better tracking, security, and content management.
Name & Tag Assets: Use a clear naming structure for better reuse and governance.
Advanced Tips
AMPscript Personalization: Use AMPscript to dynamically display images based on subscriber data.
%%[
SET @segment = AttributeValue("Segment")
IF @segment == "Premium" THEN
SET @image = "https://image.url/premium.jpg"
ELSE
SET @image = "https://image.url/default.jpg"
ENDIF
]%%
<img src="%%=v(@image)=%%" alt="Segment Image" />
Use CloudPages/Email editor for Previews: Host campaign previews or dynamic versions via CloudPages/Email previews.
Conclusion
The Image Block in Salesforce Marketing Cloud is a deceptively simple yet powerful element that helps bring your emails to life. From banners to buttons, and personalization to performance, mastering how and when to use image blocks will drive better engagement and elevate the overall experience of your campaigns. Remember, it’s not just what your audience reads—it’s also what they see that leaves an impression.
So next time you’re building an email in SFMC, treat your visuals with intention. Your image block might just be the silent hero of your message.


Very informative content